Friday, 12 December 2014

No dig please, I'm lazy.


I've heard a bit about the 'No Dig' method of gardening and as with most things I do, whether gardening or otherwise, I find out the basics and fumble my way through, wondering afterwards why it didn't work and think what a stupid idea it was in the first place, or on the rare occasion, be bloody amazed that it did work. This I think will be no exception. I did take a look at Charles Dowding's website, he's quite an authority on the subject, but with so much information and so little time, I quickly found what I needed and set of to the allotment. Basically, you can turn a lawned area turn into a veg plot without any digging. All you do is mark out your bed, put cardboard down in that area and wet it, put some leaf mould and/or manure at least 2 inches thick on top of the cardboard and then compost and topsoil on top of that. As far as I can see, that is the bare bones of it, but click on the link to get the full picture. In fact I strongly recommend you do, I'm sure that in my haste, I may have missed some details.

So pictured above is how the area looked as I arrived at the plot. I thought it would be an easy task, clear everything to ground level and put the cardboard down. If only, so much for being lazy. The dreaded brambles had taken root, 'No Dig' was out the window before I had even started. So of I trot to get my fork. Where I was digging out the brambles is also where the raspberries are growing from when I first acquired my plot. To be honest, until they fruit, I can't tell a raspberry from a blackberry. I think it may be a case of starting from scratch with the raspberries and dig it all up. After being whipped in the face a few times by the brambles and a hawthorn piercing through TWO layers of leather gloves, it was a bit chilly today, this is how it was left this afternoon.


I know its hard to tell from these photos exactly what I've done, but I can tell you that I've cleared the width of the plot by five foot deep. I have been working away at the plot these last few weeks, but I've been doing the same task for a while now and it wasn't really blog worthy. Till next time and thanks for reading.

Saturday, 22 November 2014

Garden Connect review.


Today was one of those days that I was really in the mood for spending time on the plot and I feel it was a productive day. But to tell you that I moved a few slabs about, dug up some weeds and tidy up sooner than I wanted to because the rain got heavier won't make for very good reading. There is only so many times I can add that sort of stuff to my blog before I'm tiered of it. You now know what I've been up to today, so I'll take this opportunity to review my first year taking part in Garden Connect. For those of you who are not quite familiar with it, here's a brief description. It's the idea of Matt Hiemstra, a young Canadian studying horticulture. In a bed that is 6'x2' and divided into 12 equal squares, myself and many other gardener's across the globe grow the same plants and vegetables in the same order as everyone else. Posting comments on various social media, good or bad, for others to compare and learn from each other. For a more in depth description, you could click on the GC link. This was the planting scheme for the very first year of Garden Connect.


First we have kale. I've never grown it before and as far as this single plant goes, it seemed fairly easy. The seed was sown straight into the soil and seemed to be quite happy in its little corner. I got to eat this little beauty in a soup and I'm pleased to say that I plan to grow more next year.


As you can clearly see, what is growing is not a lemon cucumber, just regular cucumber. These seeds came all the way over from Singapore and although they germinated really well, the British slugs seemed to like them far too much. So much so that from over 40 seeds, only two plants survived the little bugger's. Just as well really, because I was planning on growing as many as possible and then passing them on to fellow gardeners for those that wanted lemon cucumber.


This is supposed to be bush beans, or as we know them in the UK, French beans. But could I get them to grow? It didn't matter whether I tried them in the greenhouse, or directly to the soil, nothing happened. So this is my effort.


All my life while growing up, I was told 'Don't eat flowers, you'll die!' A bit dramatic I know, but it turns out you can eat some flowers. Nasturtiums are edible and after a few weeks of wondering 'Should I, shouldn't I' I finally took the plunge. I wish I'd stuck to the original advice and not bothered, it was awful. What's more, it grows like a weed and self seeds. I think I'm going to be busy trying to get rid of it.


My apologies, this is the best shot I have of the tomatoes. What's worse is that I couldn't get the plum tomatoes to germinate, so I got some yellow tomatoes, golden sun. Considering they were outside and unprotected, I managed to get nearly a pound in weight of tomatoes from one plant.


This is as good as the sweet pepper's ever got. I really didn't expect any more that. It just doesn't get warm enough. A greenhouse is definitely needed.


Parsnips have been my best success this year by far. I had more parsnips in this square foot than I did in all of last year. Four of them were so unbelievably big that I put my fork through them. The seeds where started off in a clear sandwich box, on a wet sheet of kitchen paper. Once they started to sprout, they were sown. This is something I will try again.


Spinach is another vegetable I have not grow until this year. Not knowing what to expect, I let them go to seed before I realized. Oops!


I've never done too well with lettuce in the past due to slugs. Not much has really change, but I got a few to eat.


You see, this is what happens when you don't thin out your carrots. It's something I need to learn to do. I'm just glad to have grown carrots.


I like to think that I've not really had problems with onion sets sown in the spring. I put them in, they got big, I dug them up.


I've never been a fan of beetroot, but this year I've sliced them thinly and fried them. Thank you Garden Connect.

So that was my first year taking part. I'm looking forward to next year to see what I mess up and what I do well with. Till next time and thanks for reading.

Friday, 14 November 2014

Road works.


It has been a couple of weeks since if made an appearance on the plot, but honestly do have a very good excuse, you see I spent last weekend in Suffolk with a few gardening friends I've been wanting to meet for a while now, Phill (AKA @suffikboi), also Sally and Michelle from the 'Big Allotment Challenge'. Three of the nicest, down to earth potty mouthed people you could want to meet. Although it was gardening that brought us together, it was a subject that sometimes came into conversation it's fair to say. We were like a bunch of kids on a school trip that had broken away from the main group. My cheeks have just about recovered from all the laughing.

So with apologies out of the way, this is what I've been up to this week. With the path that was laid two weeks ago, the rest looked a bit shabby. It was only ever a quick fix after getting rid of the grass paths, but a sort out that needed doing. The picture above shows you what it looked like and it doesn't seem so bad, but when you get up close, it's a health and safety nightmare. If anyone goes onto my plot and along the path, they would surely trip over and I would be sued. It was a good job I had my steel toe capped boots on, it was a most useful tool to rest the slab on my toes to then remove or add more soil to make it all level. This is how far I've got with it. I'm nearly at the end of the plot, but that's not even half the job done. 


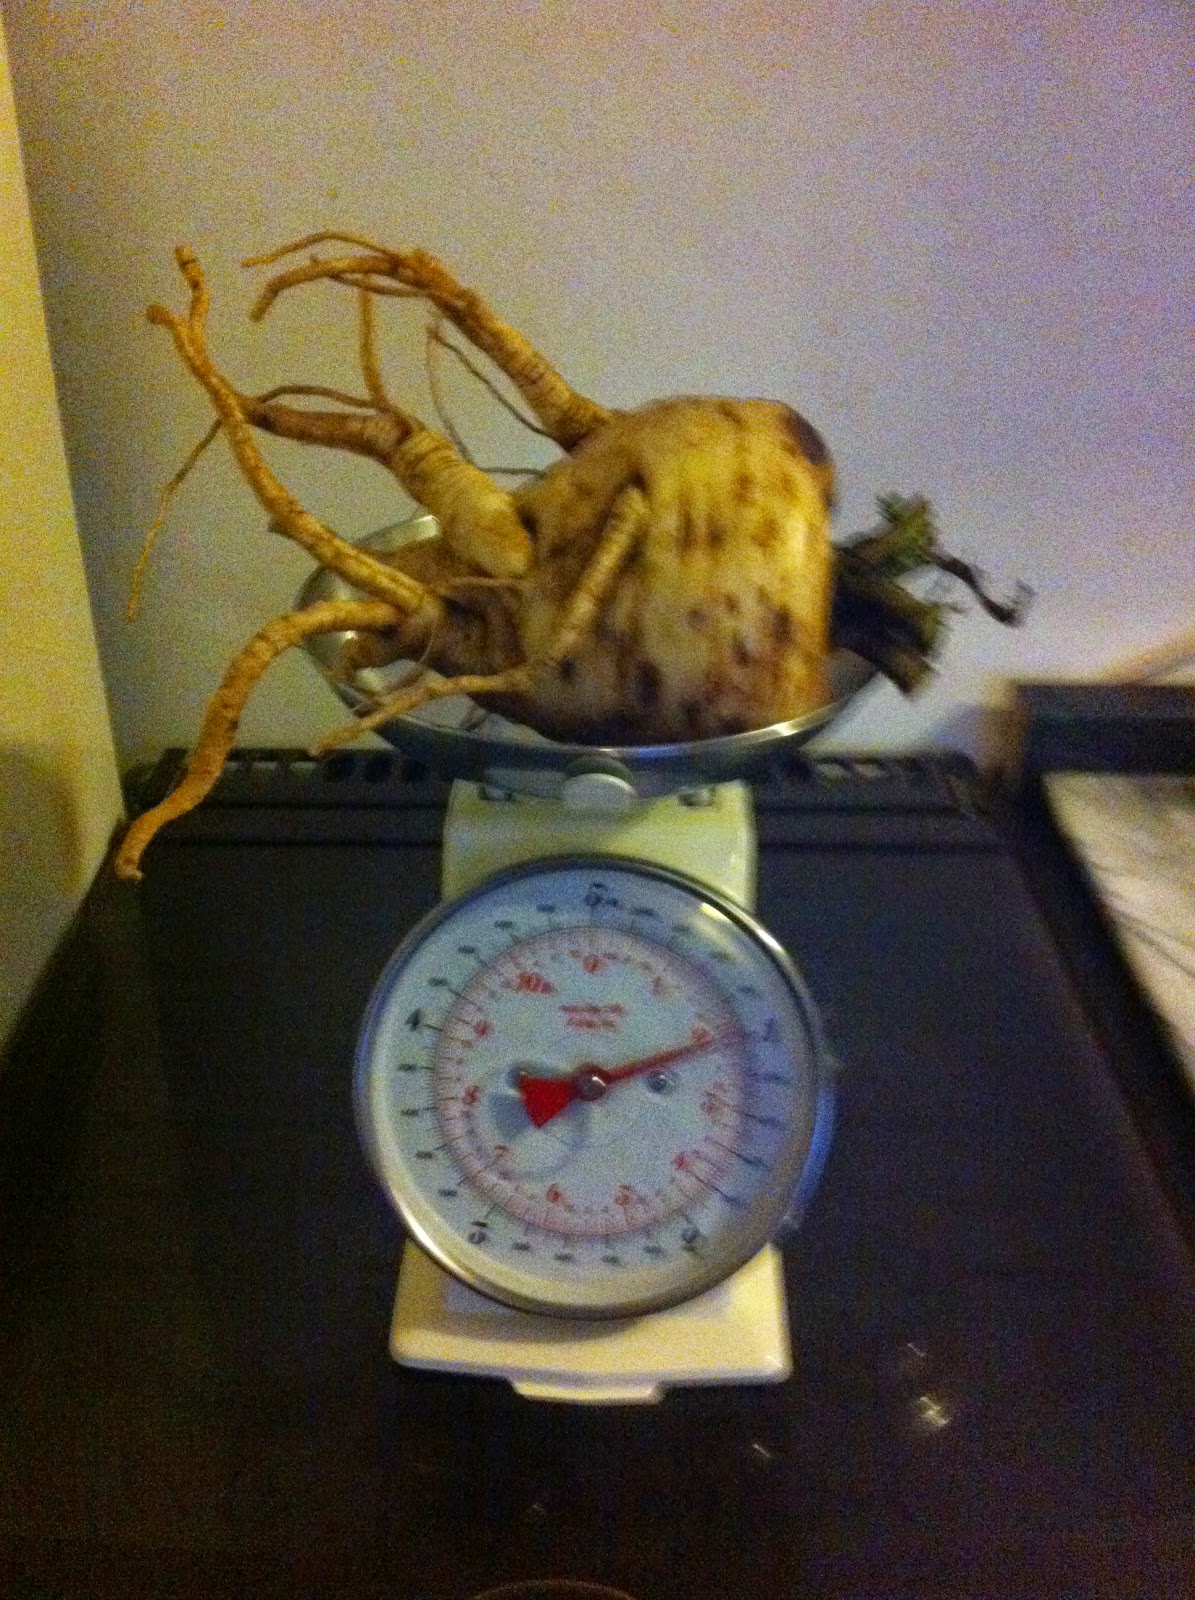
I didn't just mess about with the slabs today, although by the time I got home I wish I hadn't started, I also dug up a parsnip for our tea. An ugly bugger I will admit, but also a bloody heavy one too. I recently bought some scales and this was my first opportunity to try them out. Can you believe it's just under a kilo in weight, or just over 2lbs in imperial measurements. Till next time and thanks for reading.


Friday, 31 October 2014

Tidy up.

How warm was it today! The last day of October and it felt like spring with temperatures up to 19 Celsius. Going to the allotment today was a must. Although I had left the path repair unfinished, the beds needed attention and the path would just have to wait.


This is how I found the brassica tent and what was left inside looked worse. Let's just say I had ready shredded cabbage. The slugs have had themselves a banquette. The last of the potatoes needed digging up and after only a week the nasturtium is continuing to rear it's ugly head. So digging the beds was what I spent most of my visit doing.


I have been told that the more you work the soil, the more bugs are exposed for the birds to eat. So I'll be turning the soil regularly this winter and feeding the birds, tuppence a bug. I can also keep on top of the weeds as well.


This is how I finished for the day. All the beds on this side are now clear. I still have a few leeks and swede left and I still have a whole load of parsnips.


The best thing about Autumn that many people seem to comment on is the amazing colours. This is my grapevine, the photo doesn't do it real justice, but it's best shot I've got. Till next time and thanks for reading.

Sunday, 26 October 2014

A Taste of Spain.


I may be very British in my ways, I love tea, a Sunday roast and proper beer, none of that Euro lager. But I haven't forgotten my roots. My parents are from North West Spain, Galicia. Not a very popular destination for British tourists. It's known as green Spain because, from October to April, it rains constantly. On a cold wet winter's night, the last thing you'll want is paella, you'll want something warm and hearty. Growing up in England my parents still cooked up many traditional meals, meals that until recent years have been know as pauper's food, cooked in large quantities that would feed the family for a few days. Recipes can change for one family to another or from what you have available. With that in mind and knowing my view on recipes, I would like to share my version of 'Caldo', a stew with cabbage, ham and chorizo. So this is what you'll need.


  • 1 Large marrow
  • A handful of potatoes
  • 1 medium onion
  • 1 stock cube
  • 1 litre of water
  • 1 cabbage
  • 1 chorizo ring
  • 1 pack of ham trimmings
  1. Peel, core and dice the marrow. Peel and dice the onion and half the potatoes.
  2. Put them all in a large pad with the water and stock cube then boil until soft.
  3. Blitz it all in a blender or use a hand blender.
  4. Peel and dice the rest of the potatoes, cut the cabbage, chorizo and ham (if the ham trimmings are too big). Put them all in the pan until the cabbage and potatoes are soft.
  5. Serve with some crusty bread.
The first part of this recipe, steps 1 to 3, is my marrow soup I posted last year. I did mention at the time that it was a bit bland, so I've been using it as a basis for soups and throwing in what ever I had at hand. The leftovers from a Sunday roast has gone well with it.

I know this isn't an authentic Spanish recipe, I don't think they would have used marrow for a start, it should have a ham joint, a pork joint and some black eyed beans/peas, but going back to what I said about using what you have available, it does taste like my Mama used to make. Till next time and thanks for reading.

Saturday, 25 October 2014

On the right path.


Now this is how I left the plot last weekend. I've been wanting to sort this area out for my 'No dig beds'. But first I needed to lay a path. I have the materials, I've made time and the weather has been on my side as well. Over a few days, I've managed to go from one side to the other and I think I've done a fairly decent job of it too. So much so that I looked at the rest and started to sort that out too, but then the sky's went black and this is how it has been left at the moment.


Sorry about my finger or earphone wire, but its all there. You can see that I've started on the previous path, but for a few inches, that last slab just doesn't fit. I know that further along this path, once I've sorted out the rest, I can get those inches back and it will look better.


On one of my visits to the plot this week, while doing a plot inspection, I noticed this little bugger popping up. It looks like I'm going to have a battle on my hands with the nasturtium.


I don't know if you can make out what's just been dug up, but it's a walnut. It's the third one I've found this week. I think a squirrel has been busy.


I've made another leek and parsnip soup this week and needed to dig up a parsnip. I was really careful not to put my fork through this one. Can you believe the size of this one. What's more, I don't think this one is the biggest one. I hope I don't get bored of them before Christmas. Till next time and thanks for reading.

Sunday, 19 October 2014

Chilli jam.


A few people have asked me about the chilli jam I make, either at work or via the social media. The recipe I have is originally from Nigela Lawson, or so I'm lead to believe. You see I found it on the web a few years ago and it said that it was her's. So, if you are reading this Nigela, which I doubt very much, thank you for the recipe. Of course if it's not one of yours, Shhh! Nobody needs to know otherwise. I'm putting it on my blog simply because I have recipes on scraps of paper, on emails and I even have some in cook books. Ha, who knew.

So this is what you will need.

  • 150g Chillies (deseeded if you don't want it too hot) cut into 4 pieces each
  • 150g Sweet red peppers cored, deseeded and cut into chuncks
  • 1kg Jam sugar
  • 600ml Cider vinegar
  • 6 x 250ml Sterilized jars
  1. Put the chillies into a food processor and pulse until finely chopped.
  2. Add the chunks of sweet peppers and pulse again until you have a vibrantly red flecked processor bowl
  3. Dissolve the sugar in the vinegar in a wide, medium size pan over a low heat without stirring.
  4. Scrape the peppers out of the processor and into the pan. 
  5. Bring to a boil and leave it at a rolling boil for about 10 minutes.
  6. Remove the pan from the heat and allow to cool. The liquid will go from syrupy to jelly as it cools.
  7. After about 40 minutes, or once the flecks are more or less evenly distributed in the jelly, ladle it into your jars and seal them tightly.
  8. Store in a cool and dark place for up to a year. Once a jar has been opened, it should be stored in the fridge and consumed within a month.
So that's it. This batch does have 100g of red chillies and 50g of birds eye chillies with quite a few seeds left in for heat. As yet I haven't actually grown any of the peppers that have gone into it, one day. Don't forget to wash your hands after handling the chillies and while blitzing it, the vapours will affect your eyes, so wear swimming goggles. Till next time and thanks for reading.